discovering a simpiler life

discovering a simpiler life

Monday 31 March 2014

Lushious leftovers lamb pie

Living frugally is getting the most out of your shopping dollars and the most from the food you need to eat.  It also helps to make them as tasty and delicious as you can so you don't feel deprived.  The easiest way I know to save on meals is by making the most of your leftovers.  Australians  reportedly waste over $1,000 per household per year on food.  That's 8 BILLION DOLLARS (gulp) worth of food that gets thrown out each year.....I know.....ok now I've taken a big breath and swallowed that bitter pill, I'm here to tell you that it's easy and actually time saving to use up this waste.  You can watch a fab little doco that I saw first on Jo's blog Down to earth Mother here, it's only 20 minutes, please for our planet's sake, take the time to watch it.  It's about waste in general and certainly got my attention.

Why do many of us live so unconsciously? 

Back to the issue at hand, lushious leftfovers.  Take them to work for lunch the next day instead of spending $15 on a brought lunch.  That's $780 you could save just by taking leftovers for your lunch one day a week, only one!  It's alarmingly (are you ready....) a saving of $3,900 if you bothered to take your lunch everyday to forgo your need for buying lunch/coffee/water/soft drink from the cafe down the road. How good are those leftovers tasting now? Imagine that money payed down on some of your debt or it's the holiday you don't think you can afford.

Freeze portions of the leftovers for dinner another night when you know you might reach for the phone to order take away.  
Or Compost it 
(as long as it's not meat or anything else you shouldn't be composting!).  
Give it to your dog to bulk out his dog food, we all know the cat's way to much of a princess to eat it though.

I love leftovers as it means its either dinner sorted the following night, or for the freezer, if it's like bolognaise sauce or cold roast meat or pasta or salad or rice, I can make another meal out of it.

For this recipe of lamb pie, it does need some love and time but nothing too 
stressful ~ 15 minutes max.  It can make 2 dinners for you too, eat one serve and freeze another.  If you really think you are too busy, the night you make the roast, peel the extra vegies required for this then and leave them in the fridge ready for when you need them.
All up this $13 piece of roast leg of lamb fed our family of 3 (with 1 very hungry man) for 3 nights for less than $6 a night when you also factor in the vegetables from the garden and gravy, so less than $2 a head, bloody bargain!

 I've been abound with gorgeous produce from our garden.  Bright orange carrots, pearly white parsnips, onions, and herbs a plenty.  
We have roast lamb at least once a fortnight, we love it.  From a leftovers perspective, there is so many things you can do with those delicious cuts closer to the bone, and for that matter the bone and this pie from my coveted Christmas pressie  Save with Jamie are a perfect family fodder.  
*A bouquet garni of sorts...celeriac leaves, thyme, rosemary are all tied together to be taken out of the pie at the end.
Lovely Lamb pie    Serves 8  taken from straight from Save with Jamie.  My additions are in brackets 
2 red onions (I used brown onions)
2 carrots
1 small celeriac  (I used parsnip)
250g lamb kidneys (I didn't use)
optional: 1 tablespoon leftover lamb dripping (to make this, drain any juices off your roast dish, I cook my lamb over a wire rack with water in the bottom to make gravy, put drain delicious juices into a jug and pop in the freezer.  The fat will rise to the top and once it has solidified it can be spooned off and used like oil ~ heaven)
olive oil
1 bunch of fresh thyme (I used the bouquet garni listed above *)
optional: I fresh bay leaf (I used dried)
1 heaped tablespoon of plain flour
2 teaspoons English mustard
2 teaspoons Worcestershire sauce
optional: leftover lamb gravy and bones
250g leftover cooked lamb
1 x 400g tin of lentils (I have a child so no chance of adding)
300g of puff pastry (1 sheet of pre-made of the frozen variety)
1 large egg
  • Peel the onions, carrots and celeriac and trim the kidneys, then chop everything into 1cm dice and put into ta large casserole pan on a medium-low heat with the lamb dripping if you have it, or a lug of oil, a pinch of salt and plenty of pepper.  Strip in the thyme leaves (or add your bouquet garni) and bay leaf if you've got one, then cook for 30 minutes, stirring regularly.  Cooking it slowly like this will create the most amazing depth of flavour for the pie filling.
  • Stir the flour and mustard into the pan then add the Worcestershire sauce, 1.5 litres of boiling water and any leftover gravy and lamb bones from the mothership lamb recipe (also in Jamies book), if you have them.  Reduce to a low heat, cover and cook gently for 1 hour, or until thickened and reduced, stirring occasionally.  Remove any bones, season to perfection, then remover from the heat and leave to cool.  Preheat the oven to 180c/350F/gas 4.
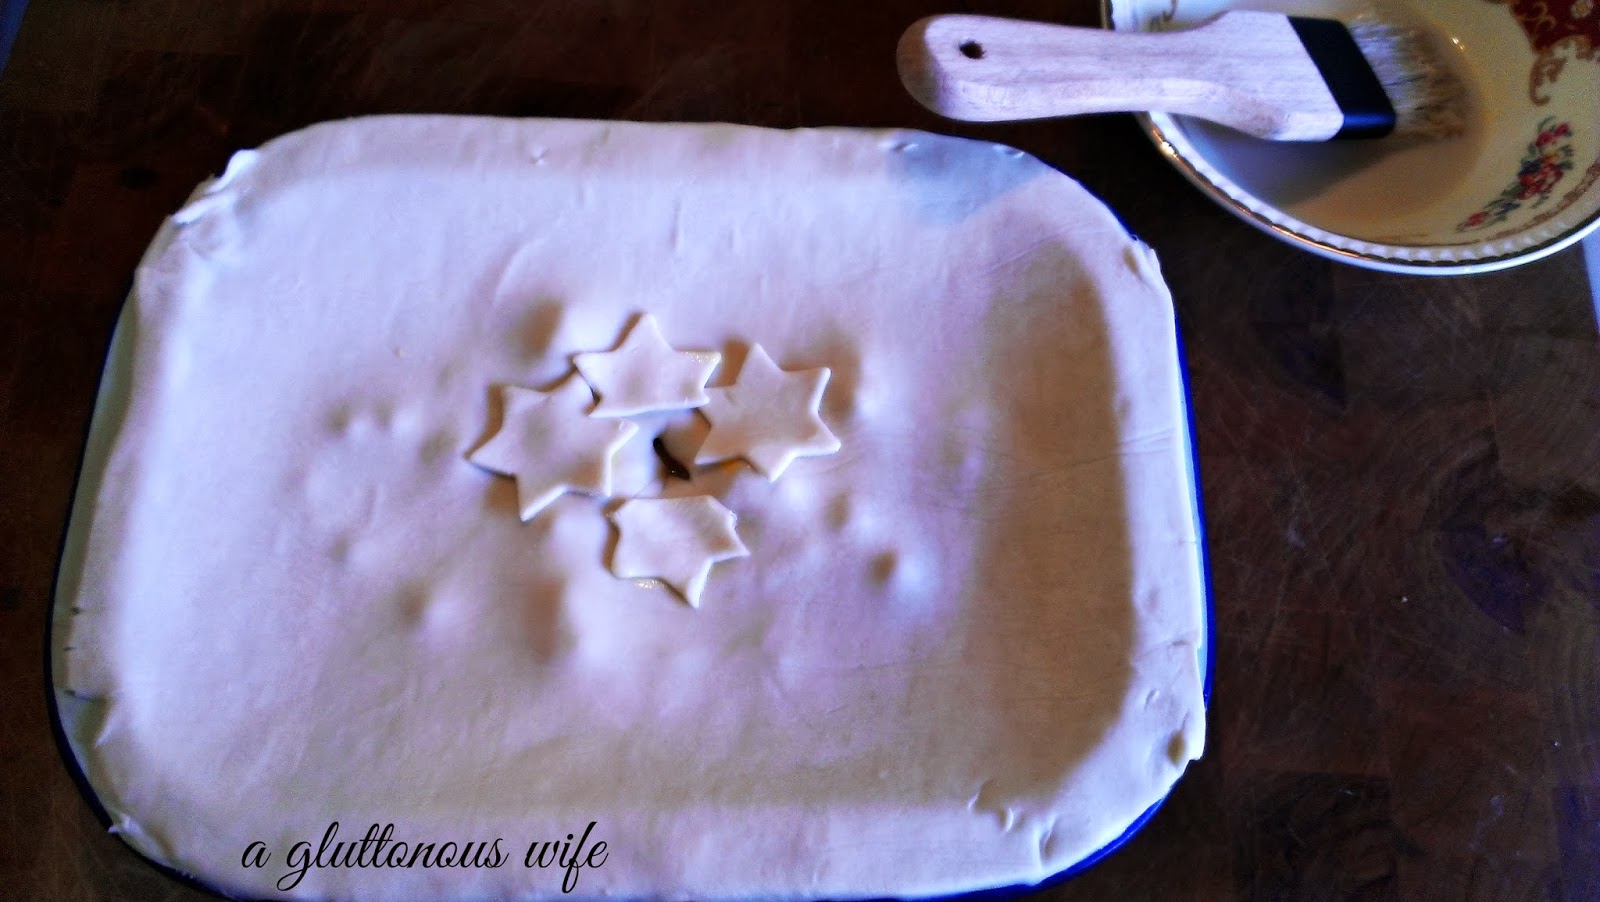
  • Once the pie filling is cool, shred the lamb into the ban then drain and add the lentils and mix well.  Tip into a pie dish (roughly 25cm x 30cm) (I used 2 smaller dishes to freeze one for another day as it was only feeding 3 of us.) On a flour-dusted surface, roll out the pastry so its slightly bigger than your dish and the thickness of a pound coin, (or use frozen ready rolled puff).  then score very lightly in a criss-cross fashion.  Beat the egg and brush around the rim of the dish.  Roll the pastry around your rolling pin and unroll over the dish.  Press to stick, then brush the pastry with more eggwash and bake for 30-40 minutes as the bottom of the oven, or until the filling is piping hot and the pastry is golden brown.  Delicious served with seasonal greens and an extra dollop of mustard.
this dodgy looking leftover roast lamb will be transformed from the dog bone, to lushious lamb pie!

I mixed the mustard together with the flour to form a paste
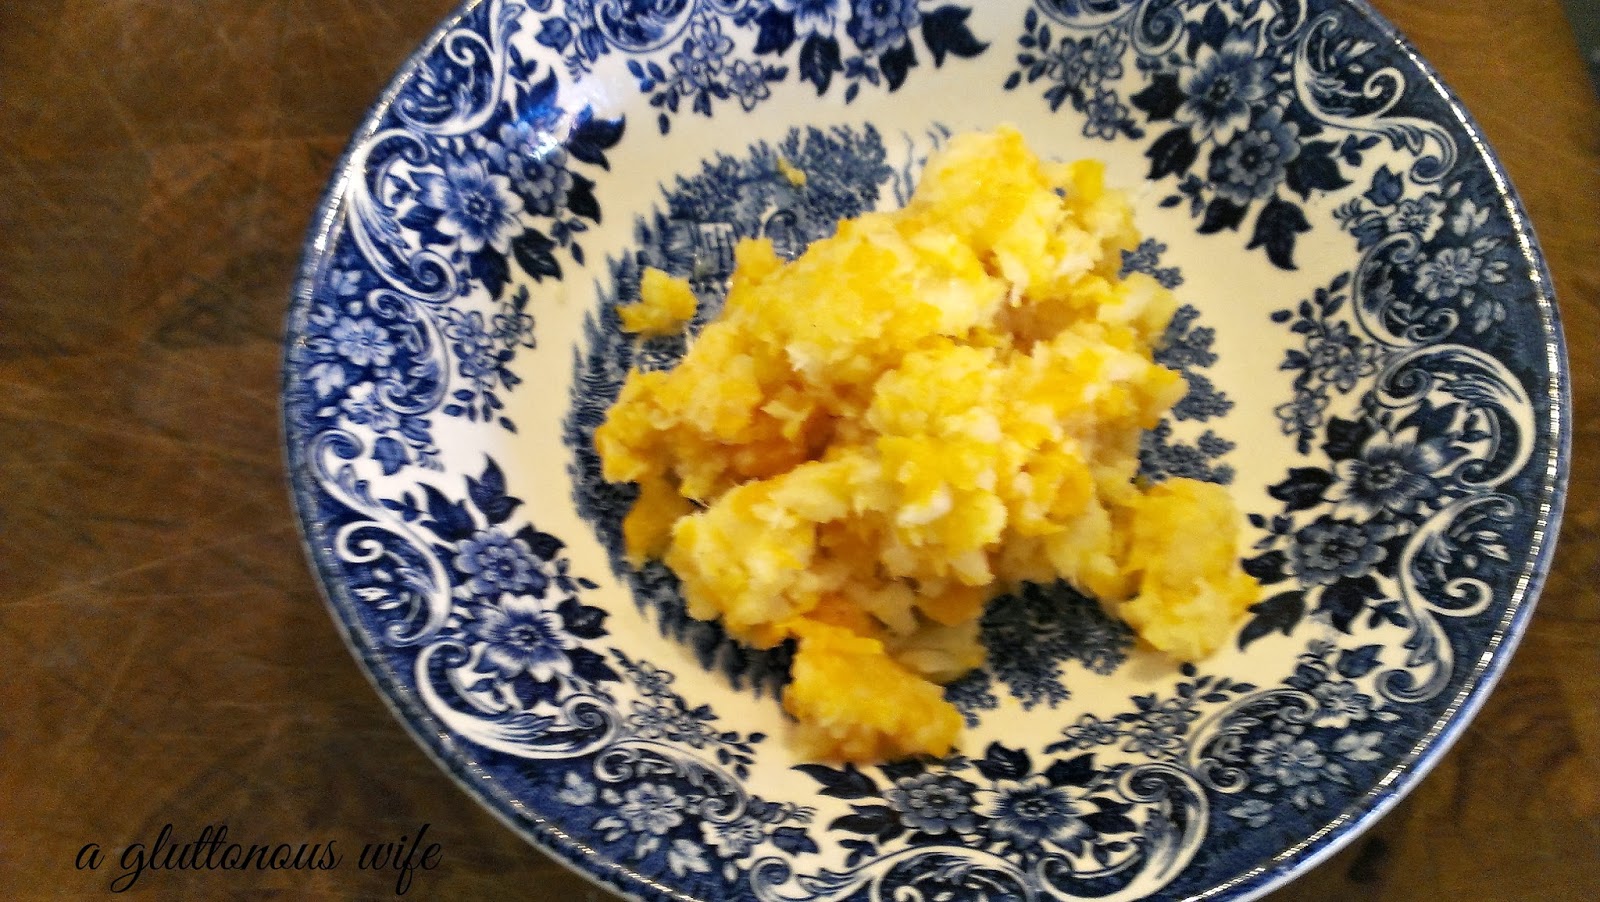
leftover carrot and parsnip mash from a previous night will help thicken this pie sauce.


One I did with a criss cross pattern, then other with some cut out stars.

We had the pie with a rocket and parmesan salad.

Both leftover roast Pork and Chicken will work just as well in this dish too.

Do you make the most of your leftovers or do you bin food even when it's good or leave it in the back of the fridge to grow legs?  I hope I can inspire just one person to make a change and save some of your hard earned cash.

Oh, I almost forgot, it's week 14 of the 52 week money challenge, and if you ditch your lunches for the weeks until the end of the year that will be over $5,000 saved!!!!!

Ciao, Jan.

Thursday 27 March 2014

heavenly spiced pears, apples and quinces

I was delivered a bounty of gorgeous home grown quinces, apples and pears from a friend who has lots of land and an orchard.   She is a friend of a friend, truth be told, but we often exchange our foodie goodies and both always get into that comfortable rhythm that happens when 2 like minded people get together, who can out do who on the cooking ideas, recipes or foodie adventures.

The fruit lay around for a few days until I had the time to get my creative juices flowing.  I looked in the cupboards and thought of what I had.  Slow cooked in spices was where I headed.  I didn't have any flash vanilla beans, cinnamon quills or star anise but I did have a will and dried spices.  So I started with a basic sugar syrup which I roughly measure out 2-1 ratio - 2 cups of water to 1 cup of sugar.  You can make it sweeter or less so, just taste as you go.  I added 1 teaspoon each of cinnamon and ground ginger and I grated in a good 1/4 of a fresh nutmeg- and wouldn't you know it, it fell in so there it stayed.  The peel and juice from an orange and you are ready to put it altogether.  Peel and de-core your quinces, apples and pears, although I left the stem and core in the pears as they were small and I wanted them left in their original shape.

Place the fruit in an oven proof dish and cover with the spicy liquid and pop the lid on or cover with foil and slow cook at 150c for 3 hours or until the quinces go a lovely shade of ruby red.

The syrup can be drained off and reduced further in a saucepan to get it thicker if you like.  I've frozen these in batches, ready for when winter hits.  
I never tire of what happens 
when you cook basic ingredients well.
  These are sticky sweet with that heady spice flavour that I just know will be perfect for the goodies I'm going to bake with them....crumble, whole pear and apple cakes and just eaten warmed with a dollop of yoghurt and some nuts for texture.  
Bring on the cold weather!

Ciao, Jan.

Monday 24 March 2014

simple but delicious tomato and onion pie and week 13 of the money challenge

We have almost come to stand still with our tomatoes, almost.  There are buckets of green ones that are waiting to be sun kissed, but for now I'm eating them as much as possible.  They really are so unlike the ones you buy from the supermarkets and I'd encourage all of you to plant even just one tomato plant to try the difference for yourself
My nan has always made individual tomato and onion pies to go with her legendary roast dinners.  I've made this pie using the same ingredients but in a bigger pie dish.
For a start you need to slice enough tomatoes, around 3, not too thin, not too thick for the bottom layer.  Finely slice an onion and 5 cloves of garlic and spread them over the tomatoes.  Be generous with your salt and pepper at this stage and then add another layer of tomatoes.  Blitz up any leftover bread you may have.  I've used my no knead bread for this one.  I save all the butts and make breadcrumbs out of them and leave in the freezer for dishes just like this.
Chop your bread into small chunks and blitz with some tomato loving herbs ~ oregano, mint, basil and parsley.

Liberally cover the tomatoes with the breadcrumbs and dot with butter and pop into a 180c oven for approximately 40 minutes.  De-vine!

It's week 13 of the 52 week money challenge if you are playing along :)

Ciao, Jan

Friday 21 March 2014

beetroots in a pickle

We have beetroots coming in hard and fast and I just love them pickled.  It not only helps preserve your purple delights for months, it's a delicious way to enjoy them now.
The process is quite simple and the end result so much nicer than their canned cousins.  Simply cover your washed beetroots with cold salted water.   Don't be tempted to cut the ends off as this will make them bleed their magenta juices.  Bring them to the boil and keep checking them for readiness.  They are done when a folk goes in easily to the centre.  I did have to re do some jars that I'd realised were too hard when I cracked a jar open.  That was easily remedied by putting the lid back on and putting the offending jars into a big pot of water and bringing it up to the boil for 5 minutes or so.  This re-seals the jars and cooks the beetroots that little bit more.  I'm thinking I might experiment with cooking them this way, peeling them raw, jarring in the pickled liquor and leaving them in the boiling water for 20 minutes should do the trick and cut back a few steps.  
Anyway, back to the recipe!
Don a pair of rubber gloves or if you don't mind red stained hands don't, and peel the skin off, top and tailing as you go.  The skin should all but slide off without too much force.
Turn your oven on and collect, wash and dry the jars you are using for the beetroots.  When it comes to cutting them, it's totally up to you which way you go.  Sometimes if I have small beetroots I will keep them whole, cut them in slices or into wedges, it really doesn't matter.
To make the pickling liquid, in a saucepan bring 3/4 cup of vinegar (can be plain or white wine), 1/2 cup of water (filtered is best), 3 tablespoons of sugar and 10 or so black peppercorns.  Double this quantity if you are pickling a large amount of beets.
You need to put your jars into the oven at 150c for 5 minutes or so and add the prepared beetroot in and then topped up with the hot pickling juice and lid straight away.  I like to add a few sprigs of mint or thyme as well.
I love this beetroot drained and made into a walnut, feta and beetroot salad or along side some ham off the bone, a soft boiled egg and vine ripened tomatoes as a quick dinner on the run.

Ciao, Jan.

Wednesday 19 March 2014

Little changes to life

This is very much not unlike the list you might write at the beginning of the year, but I thought it might be nice to actually write down what I've changed over this past 7 months of slipping into this simple life.  
I didn't start out with my blog to head in this direction, but that's the thing about life, you never know where you may end up.  Trying to live more mindfully and simply is both a challenge but so rewarding, I have to remind myself I'm doing the best I can.  It can be harder to do when you are pushed for time and energy as it isn't always the easy route.  
I'm still trying to CTFD but if I'm honest, I'm a control freak, but I still quietly repeat this mantra!  Letting go is difficult but I'm finding more genuine happiness with what we are doing as a family and with the dear people I am surrounding myself with.
  1. Make my own bread from scratch and have unearthed a new love and hobby, dangerous for the waistline.
  2. Make all lunchbox goodies from scratch.
  3. Have my own 14 year old sour dough that I am loving experimenting with.
  4. Make my own chemical free household cleaner and air freshener.
  5. Make my own laundry powder.
  6. Cook almost all meals from scratch.
  7. Make my own pizza dough and tortilla dough.
  8. Have taught myself how to confidently bake cakes and muffins.
  9. Recycle and reuse as much as we can.
  10. Compost all vegetable trimmings.
  11. Grow as much as we can in our garden.
  12. Started a stockpile.
  13. Started a budget.

My goals for 2014
  1. Help make a chook house.
  2. Have our own chooks in said house.
  3. Get better at sour dough and find a simpler recipe.
  4. Make pasta from scratch.
  5. Change as much as we can afford to organic and/or Australian made.
  6. Actually save some money instead of relying on credit.
  7. Learn a new craft or skill.
  8. Challenge my baking skills ~ making a lemon meringue pie and macarons are high on my list!
  9. Read more books.
Do you make lists of your goals or do you just sail along on this life hoping for the best?


"If you cannot keep pace with your companions,
perhaps it is because you hear a different drummer.
Step to the music you hear however measured or far away."
Henry David Thoreau
Ciao, Jan.

Monday 17 March 2014

Easy peasy salmon patties and week 12 of the money challenge


I was left with a mound of mashed potato and remembered how much we love salmon patties.  These little beauties were dished out as a tuna variety when I was growing up but I think the salmon ones aren't as dry.  
These are made with all ingredients from our stockpile

I'm trying to shop light this week and use up what we have ~ sort of shopping from your cupboards!  So apart from fresh fruit, that should be all we need.  I'll change that, it will be all we get, it's the easiest way I know to save quick cash, and we have a trip planned for next month that would benefit from some extra kitty thrown at it.  

There is so much I forget about in our cupboards.... Things like dried chickpeas, pearl barley, cous cous and pulses that need ahead planning for soaking, but that can be made into a delicious meal.
I really enjoy the process of making these patties: rolling, crumbing and frying.  This is a double batch which makes around 24 patties depending on the size you make them.  Freeze them at the crumbed stage in layers of baking paper for best results.

Salmon Patties
2 x 415g tin's of pink salmon
mashed potatoes, around 500g -800g and of course you can also use mashed pumpkin and sweet potato or a mixture of them all
juice and zest of half a lemon, or a splash of lemon juice 
2 spring onions or small bunch of chives finely chopped
a good handful of parsley finely chopped
2 eggs
2 cup of breadcrumbs ~ 1 cup used for crumbing

good amount of salt and pepper
  1. Mix everything together except for the breadcrumbs for crumbing.  Roll into balls and flatten, coating with breadcrumbs.  It's easiest to roll all the patties first then crumb them all.
  2. Heat a heavy based fry pan and add in enough oil to come up around 1 cm deep.  Check it is hot enough by placing a few breadcrumbs in and if they sizzle it is ready.
  3. Fry in batches and turn once, then popping the patties onto paper towel.
  4. These can be served from here or put onto a baking tray and placed into the oven to keep hot until dinner ~ around 30 minutes on 150c.
It really is best made with day old mash or mash made in the morning and used in the afternoon so it is cold.  You can also blitz up the herbs with 1 raw carrot to get some more vegies in there.  I've also had great success swapping 1/2 a cup of the breadcrumbs in the mixture with uncooked cous cous.   Serve with a salad with a good garlicky aioli and a wedge of lemon.


It's also week 12 of the 52 week money challenge. Are you still saving? Anyone broken into the stash? I have to say, I think it's going to be hard to stick to when the weeks 40-50 come around!

I hope you all have a great week and take the time to stop and smell the roses, whatever it is that fills you up.  A few beach walks are on my list of must do's.

Ciao, Jan.

Wednesday 12 March 2014

My perfect take away breakfast

We had to be in the city a few weeks ago.  A day trip filled with appointments and schedules to keep.  It was to be an early start so the night before I set to making my breakfast for the 3 hour road trip.  
I'm an organised traveller, and where I can I try at all costs to avoid having to eat crap fast food.
I've seen this idea all over the internet, it isn't a new idea by any stretch. My first attempt was with an overnight oat variety which i think was a wee bit too gluggy for me. Here is my lighter spin on a jar of breakfast.
I started with a good layer of natural organic yoghurt, a sprinkling of amaranth flakes and followed by an inch of stewed honey sweetened rhubarb.  Next was  a spoonful or 2 of my own mix of seeds and nut mix (goji berries, flaxseeds, chia seeds, chopped almonds, sultanas, and sunflower seeds), more yoghurt and topped off with some of my favourite walnuts chopped and a drizzle of honey. The next morning all I had to do was shower,  make a coffee, grab my breakfast from the fridge and go. 
On the way home, we were tired and hungry and wouldn't you know it we succumbed to the golden arches.  They are so sneaky being next to petrol stations aren't they.  I needed a sugar fix fast for the journey home and ordered a fillet of fish and a soy mocha.  I had this flash back to when I was really young and we  made this trip to the big smoke with my Dad once a year.  Where we lived only had Ollies Trollies, no Mickey D's and I use to internally pine for it.  My father would never venture near these places so I use to watch them go by the car window and I'd be gutted.  There was one time I remember actually getting up the courage to ask..."Dad, can we please get some Mc Donalds, please"....I couldn't believe it when he said yes and I got my very own packet of cookies and a cheeseburger.
Silly isn't it what we love as kids, now here I was eating my almost cold fillet of fish, the bun not a bit like bread and the fish, well I'm sure there was some of the fillet in the mix somewhere....it always leaves me feeling used and abused!  
So tell me, do you pack your food for road trips or do you fly by the seat of your pants and just grab whatever is on offer?  

Ciao, Jan.

Monday 10 March 2014

brother from another mother...rye sour dough

I must admit to gloating.  I've been gloating where ever I can about my attempts at sourdough bread making.  I'm riding high on the thrill of bread coming out of my oven.  I've gotten the bug and been bitten hard.  Months ago, when I started my bread making, I persevered and perfected the 5 minute no knead bread so when I was given the first chance of making sour dough I secretly thought I'd ditch it, it would be too hard, too onerous, but then came the rye sourdough starter and all that changed.  I'm still making the white sourdough and lovingly feeding her each week when she's starving, but this rye mother is less needy.  It is not as time consuming nor do you need to be checking your schedule and clearing it for days in advance, not that my dance card is that full, mind. 

 When I was given these starters it was with the words ringing in my ear "stick to the recipe, to the letter" well I'm afraid that's where I fall down, a bread rebel without a cause....serves me right for getting too cocky. I've killed my first rye mother and I'm devastated....but it was worth it, let me just say.  I've already put the call out for another.  For any of you who want to try her out, here is the recipe, step by step.
Compared to the original sourdough I was kindly given, this mum is sloppier and bubblier, probably more what you might expect from a starter.  I still don't like that you throw out a large portion, but if you live near me and want to start I'll happily hook you up.

To feed the rye starter
take your starter from the fridge and weigh out:
30g starter
60 tepid filtered water
45g rye flour
Mix into a batter, ditching the left over starter or making 2 of these feed starters to give to a friend.  If you are wanting to bake with it from here, leave it out on the bench until it has doubled in size, around 12-24 hours.  If you are just feeding and leaving for another day, keep her out for an hour and then pop back into the fridge.
Step 1  To make bread
weigh out
50g starter
75g tepid filtered water
75g rye flour
Mix into a paste in a bowl and cover with glad wrap and leave at room temperature for 8-12 hours or over night basically

Step 2  Bread dough
weigh out
200g starter (from what has been sitting out overnight)
350g tepid filtered water
350g plain flour
150g rye flour
10g salt
I actually mixed this up with my mixer with the dough hook attachment as it is very sticky and you are trying to avoid adding more flour, it came up a treat.
Stir the 200g of starter with a spatula to break it up and then add all the other ingredients and knead for 10 minutes.  I also made a double batch which worked equally as well.
Transfer dough to a lightly oiled bowl large enough to allow for it to rise to 1 1/2 times its original volume which will take approximately 2-2 1/2 hours at room temperature.
Ok, this is where I changed the rules and rebelled....

Step 3  Shaping the dough
The original instructions said to line a colander with a tea towel and dust heavily with rye flour.
Lightly dust your bench with flour and scrape your dough out and shape a rough ball, fold towards the centre.  Place round dough smooth side down into the colinder and cover with glad wrap and allow to prove for 1 1/2-2hrs.
1 hour prior to baking, heat oven to 200c and after 30 minutes add a baking tray to put ice into to create steam.  Uncover dough and gently palce onto a baking tray making cuts on top and throw ice into skillet and bread in to bake for 40-50 minutes.

My Step 3  
What I did instead was just let the dough prove for an extra 2 hours in the original bowl in step 2, no colander used.  After that 1 1/2 hours I turned the oven on to it's highest setting and sat my camp oven in it to heat for 30 minutes.  I then floured the bench, and made a ball, folding towards the centre and let it sit for 15 minutes and then added it to the campoven, with the lid put back on for 30 minutes, then oven turned down to 200c with the lid kept off for a further 30 minutes.  This method/time is the same for a single or a double batch.


Allow to cool on a wire rack for at least 30 minutes if you can stand it.


As I don't eat alot of bread, I love to have 3 or sometimes 4 different toppings on one large slice.  Here is, left to right, my homemade tomato chutney, a friends gorgeous apricot jam and some bartered local honeycomb....mmmmmm  

Ciao, Jan
Related Posts Plugin for WordPress, Blogger...