It's July...only 5 months til Christmas can you believe it!! We are in the full swing of winter here and my oh my it has been brisk. Perfect weather for the oven and I've been bitten hard by the sour dough bug this past month, so get ready for lots of bread! I'm hooking up with
Celia from Fig Jam and Lime cordial along with hundreds of other food obsessed bloggers from around the world. If you love to see what's in other peoples kitchens, pop over to Celia's blog and get stalking!
I'll have to apologise for the exposure of some of the picutres - firstly I had to resell my new camera as it just didn't do what I hoped (rookie error!!) so it's back to my phone and secondly it's so dim in my kitchen and it gets dark so early :( but anyway,
grab a cuppa or a wine and settle in cause here we go.....
I'll admit, I've been crocheting over blogging due to a few orders for my
granny stripe blanket. I'm halfway through this one now and am loving it just as much as the first one.
In my kitchen has been a steady stream of Jerusalem artichokes and parsnips.
In my kithchen, I've been crushing on this coconut yoghurt - delicious!
In my kitchen has been lots of cos and mint - I had it this day with fried rice, a dry fried egg and wrapped it up in the cos - yummy healthy lunch. I've been trying to increase my leafy greens and fresh vegetable intake.
In my kitchen has been lots of soup for lunch too, especially this prawn chowder - I blanch a mix of freshly picked beetroot leaves, kolrabi leaves, kale and spinach to top this off as a vitamin power house. I sometimes also add a poached egg to my soups to give it that extra protein hit and they add a natural creaminess to them if you keep the yolk runny.
In my kitchen has been lots of sourdough and changes to my sour dough. This starter above is from a dear friends which must be around 15 years old now. I did experiment with this starter some time ago which you can read about here but to be honest, I didn't quite gel with the length of time needed to get to the final product and I killed her. This is a new one that I hope to keep going alot longer. There seemed to be so many steps and seeing as I'm an instinctive baker rather than a chronic step follower ( such a rebel :) )
I did lots and lots and lots of reading online but finally found what I was looking for.
Enter my new 100% hydration starter that contains the original starter.
Isn't she beautiful!
I just naturally feel like it's more 'alive' and gets quite bubbly when left in the fridge. Basically it's 100gm starter, 100gm water(weigh on scales) , 100g flour. I feed her once a week, and/or the day before I want to bake a loaf or two. I can do it all the night/afternoon before and bake it the next morning - perfect!
Here are some of the useful blogs I used to get to where I am now.
Celia's bread section on her blog - this has been a great find. Celia is very passionate about her bread making and has taken the time to document lots of different types. Thank you Celia for taking the time to explain this mystery in wonderful terms and taking the fear out of it and for feeding my passion!
I fed my new starter a few times over the course of 5 days. I did want to make 2 loaves so I needed to double my starter. To do this you need to start a few days before baking. I took off 150g of starter (discard the rest) and added the same amounts of water and flour(150g). I left it out on the bench for 4-5 hours in a warm spot, then that night I took off 300g starter (discard the rest...you could use it to make another starter to give to a friend or bake with it) and added the same amounts of water and flour (300gm of each). I then popped her into the fridge.
The following day after lunch I then started Celia's recipe:
300g starter (it should be bubbly)
570g water (I used filtered or from the kettle)
18g salt
1kg flour
Mix together and leave out for 30 minutes. Knead for a minute or 2 and then pop on the bench til the morning.
I used Wallaby bakers flour (I've also had great success with the Laucke crusty white bread pre-mix Mr. GW accidentally brought but it has the salt in it.
I ideally wouldn't want to use this as my go to flour as it has
other preservatives in it) Don't forget to take off 100g starter to keep :)
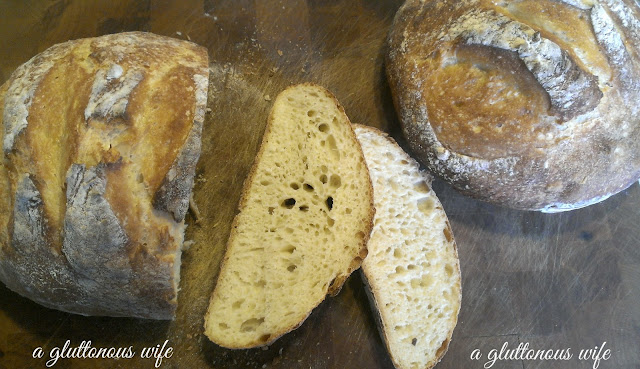
Above is the bread that resulted - not bad but not great. 5 days later I started again...but with much better results
This is the dough after it has been out on the bench over night.
Very gently tip the dough onto a floured surface and cut in half. Lightly dust with flour and lightly shape, if at all actually as you want to keep all that air in there. Your oven should be on as high as it can go and put camp oven or casserole dish to heat up for at least 15 minutes. Make sure you have a piece of greaseproof baking paper on the bottom of your vessel.
Taking care to take the camp oven out of the oven, gently place your dough in and snip the top with sharp kitchen scissors or a razor and whack the lid on. After 30 minutes take the lid off and turn your oven down to 180c.
And this is what you should have 30 minutes later.
These loaves where fantastic. I think the main difference between this lot and the first ones is that the starter has had more feeds and time to settle in. I was also gentler and didn't knead/shape this batch. I can't tell you how happy this makes me. I really have a big passion for bread baking now and never get tired of the loaves coming out of the oven. I never thought I'd get such pleasure from something I though would be so hard and I'd never be able to do. Just goes to show you where having a go and not worrying about the failures can lead you.
So that's me for this month.
Thanks for taking the time to stop by, your comments are greatly loved and appreciated. I'm now off to see what's happening in everyone else's kitchen this month.
Ciao, Jan x


